If you’re new to the Mac world, chances are you probably aren’t aware of many of these gestures. So to help you get started, here are all the Mac trackpad gestures you should know about to get the most out of the trackpad.
What Are Multi-Touch Gestures on the Mac?
Multi-touch gestures are essentially tap, swipe, or spread gestures that you perform with one or more fingers on your Mac’s built-in or external trackpad to perform certain macOS operations. Apple even lets you change the action bound to these gestures so that you can customize them as per your requirements.
All the Multi-Touch Mac Trackpad Gestures You Need to Know
The following is a list of all the multi-touch gestures and the operations they perform. All of these gestures can be used on a built-in and an external trackpad.
1. Click or Select an Item
Let’s start with basic Mac Trackpad gestures. Tap or click with one finger to click/select items on the screen.
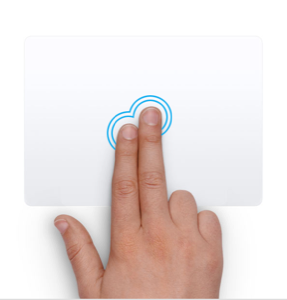
2. Right Click (or Secondary Click)
Tap or click with two fingers for a right-click.
3. Zoom In or Out on An Image or Document
Pinch in with two fingers to zoom in on an image, document, or web page. To zoom out, perform a pinch-out action on the trackpad.
4. Smart Zoom
Double-tap with two fingers to zoom in and double-tap again to zoom out.
5. Scroll Through a List or Menu
Swipe up or swipe down with two fingers to scroll up or down through a list or menu. Now, whether swiping up moves you up or down in a list or menu depends on your trackpads’ scrolling direction settings. To access or change it, open System Preferences and head over to Trackpad. Tap on Point & Click, and then depending on your preference check or uncheck the checkbox beside Scroll direction: Natural.
6. Rotate an Image or Document
Move two fingers around each other in the right or left direction to rotate a photo or any other item clockwise or anti-clockwise respectively.
7. Swipe Between Pages
Swipe left with two fingers to view the previous page and swipe right for the next page.
8. Access Notification Center
Swipe left from the right edge of the trackpad with two fingers to get to the Notification Center.
9. Drag Items on Your Screen
Select items you want to move—within the same app or between two apps—and use three fingers to move them across the screen or app. Then, click or tap to drop the selected items.
10. Look Up and Perform Context-Specific Actions
Tap with three fingers to look up a word. Be it a phone number, address, or any other such data; this gesture will bring up a suitable context menu with a list of various actions you can perform on it.
11. View the Desktop
Swipe out with four fingers—like a spread gesture—to view your Mac’s desktop. Or, you can use your thumb and three fingers to perform this gesture.
12. Open Launchpad
Pinch in with four fingers for accessing the Launchpad. Alternatively, you can also use your thumb and three fingers.
13. Access Mission Control
Swipe up with four fingers in order to access Mission Control.
14. Access App Exposé
Swipe down with four fingers on the trackpad to bring up App Exposé, i.e., all app windows you’ve currently got opened.
15. Swipe Between Full-Screen Apps
Use four fingers to swipe left or right to move between desktops and all full-screen apps currently open on your Mac.
How to Change Trackpad Commands on Mac
While most of the trackpad gestures listed above will work on your Mac out of the box, there are a few gestures—like the three-finger drag gesture to move items across the screen/or an app—that will require you to modify your trackpad settings. Follow these steps to change these actions:
Do Things Efficiently on Your Mac Using Trackpad Gestures
Gestures simplify performing a lot of operations across various apps and system settings on the Mac and save you a few extra clicks and the effort of having to navigate through different menus. Listed above are all the trackpad gestures you can use on your MacBook’s built-in trackpad or an external Magic Trackpad. If you ever want to check out how to perform these gestures, you can navigate to the Trackpad settings under System Preferences to view them in action.


